modern farmhouse shiplap
From the moment I seen this wall (way back in the building phase) I knew it HAD to make a statement. My mind right away went to SHIPLAP! I love the way it adds texture to a wall and THIS space was the perfect spot to try it out!
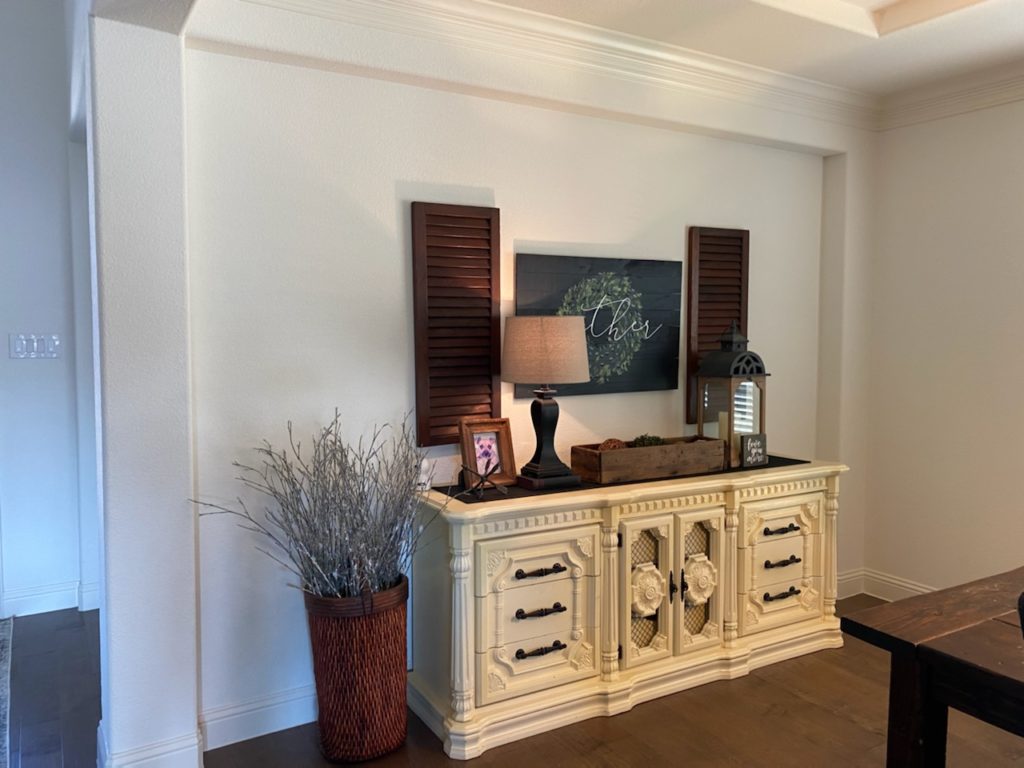
This weekend we headed out to our second home (HomeDepot) and picked up some shiplap! They actually have several different options available in store. These planks come in a variety of different sizes and widths. I ended up selecting an 8 inch width board however, they also come in 6 inches. My suggestion is whatever width you select, you continue throughout your home.
tips & getting started
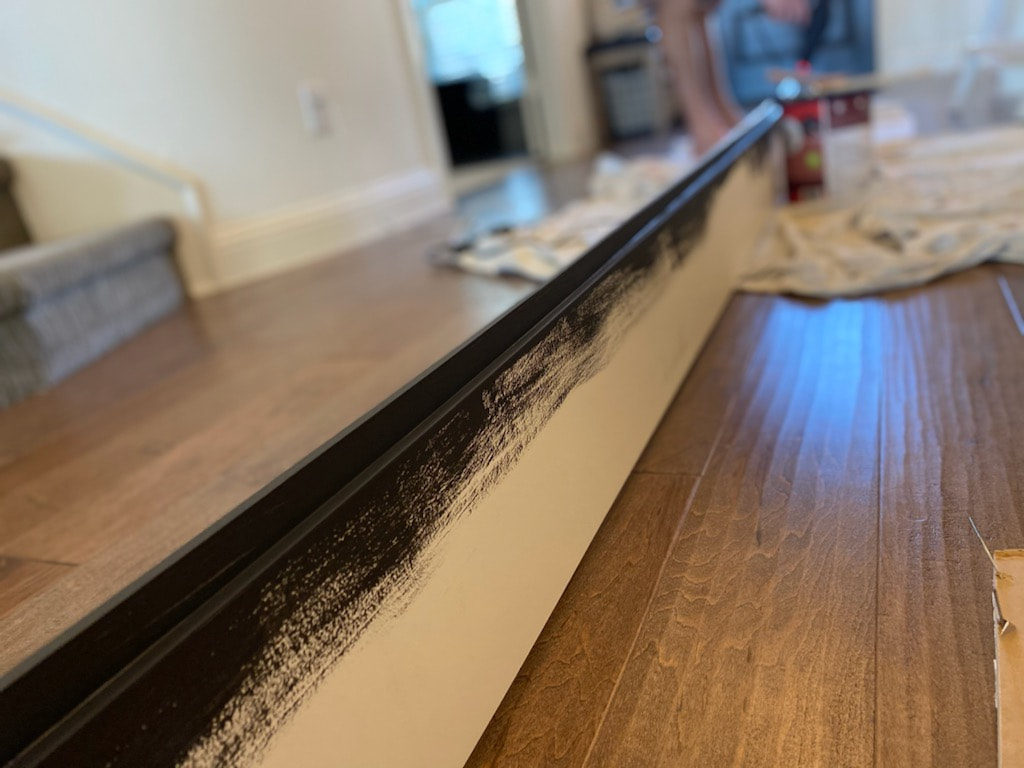
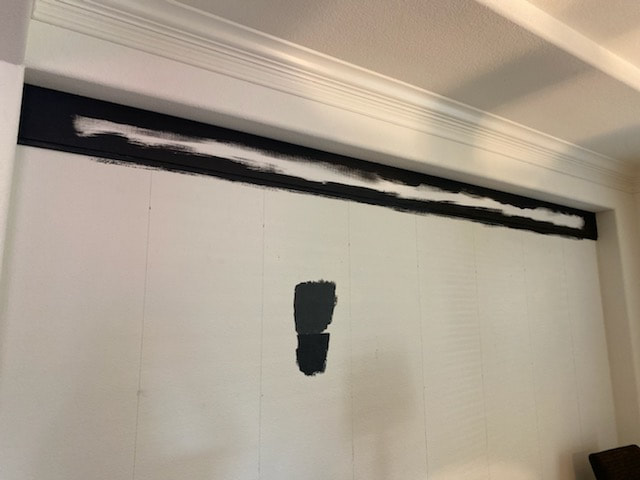
A great tip before you get started is to paint the edge of the wall where your installing! Having to go back and paint between a small space is very time consuming and hard to do, so make it easy for yourself! Unfortunately, I learned the hard way!!
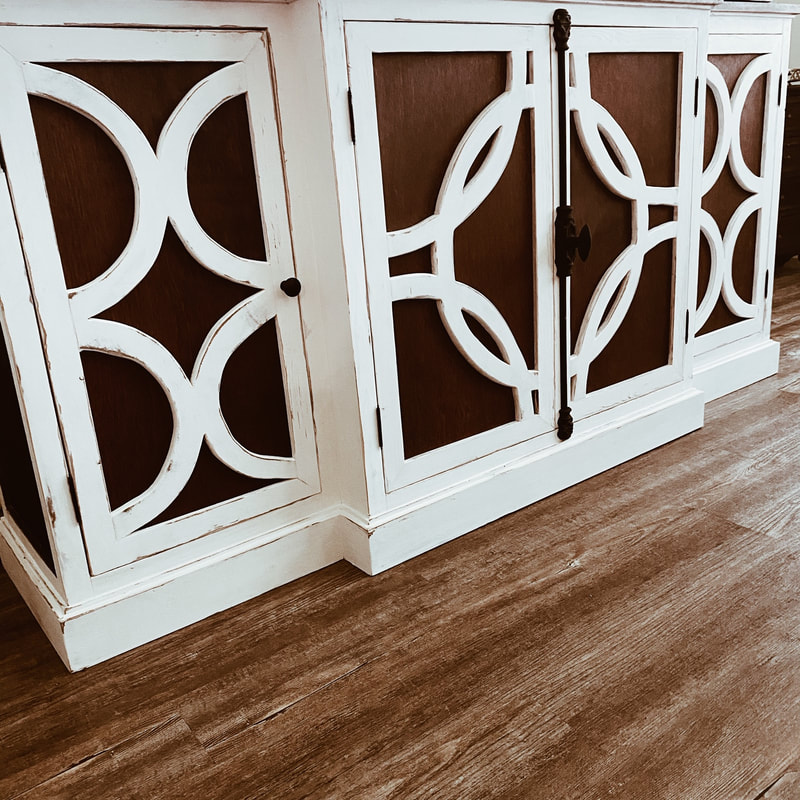
My hubby also marked the studs with a straight line down the wall so we knew where to nail down. Along with myself painting the top edge of each board. Once the board was up on the wall (nail gun and adhesive calk), I went back and painted the bottom edge before installing the next board. After the first few boards, we definitely got into a nice groove! Don’t forget to fill the nail holes!! The color I ended up using is the same black I already have in my home. It’s on our butler’s pantry cabinets and our kitchen island, so the color choice for me was a no brainier! Plus, I’ve always said my favorite color is B L A C K!!! With all the white I have in my home, a color like black helps to ground the room. Another great tip I went with a “flat” paint. The shiplap in itself is a statement, so I didn’t want to add any “extra” AKA – a sheen to the paint.
All our boards were cut, painted, and up on the wall at the end of Saturday. We actually ended the day with a second trip back to Home Depot to pick up our trim boards for the top, sides, and bottom baseboard. Then Sunday, we finished painting all the boards, trimmed out the whole wall, cleaned up and put everything back.
I’m really happy on how this statement wall turned out! I’m already brainstorming on where and how I can use shiplap again in our new home. Although, before I start to tackle anymore walls . . . I’m going to focus on getting this dining room together. Hopefully to come will be a new rug, dining room table/chairs, buffet paint update, window treatment, and some fun decor to add to my new favorite space! 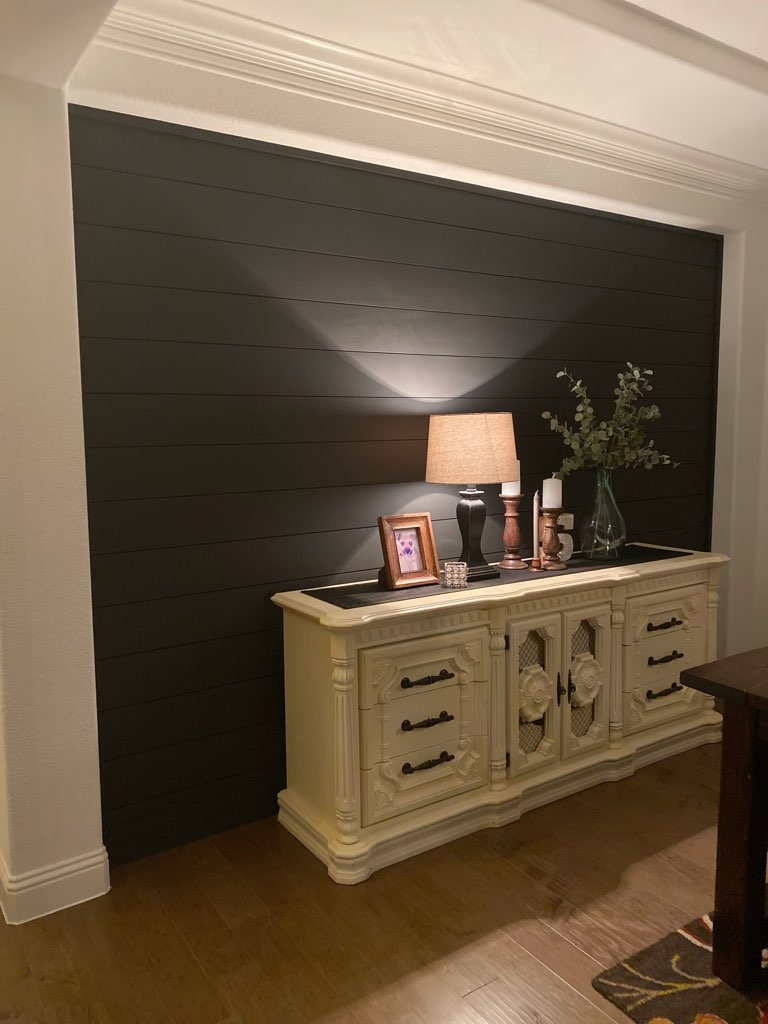


0 Comments
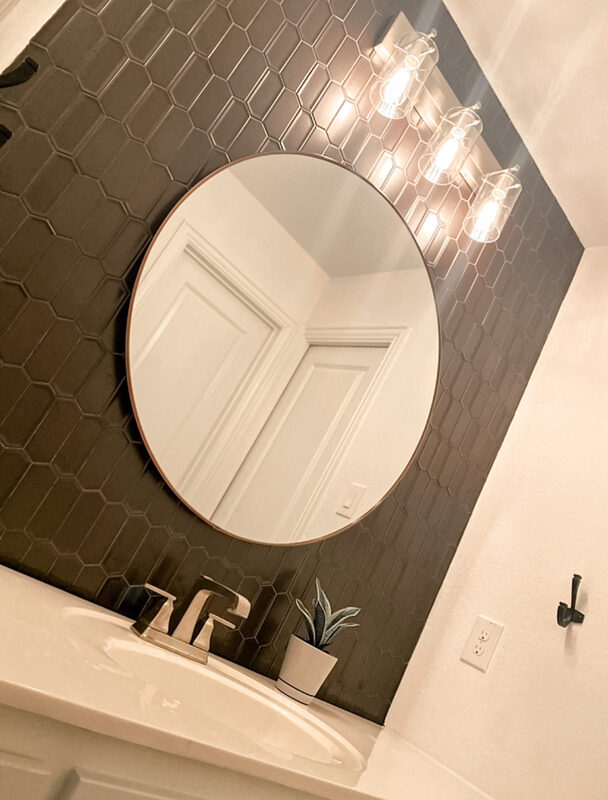
Our boys builder-grade bathroom was screaming for an upgrade! Well not really, but that’s really what I thought every time I looked around every night as I flossed & brushed teeth before bed!! I started with having the hubby tile the whole wall behind the mirror. Sticking with my Modern Farmhouse theme and the style I already have going on in their bathroom
lighting
Next, was the builder-grade lighting! I have changed out EVERY single light fixture in my house, except for the bathrooms!!! So, I was super excited to get my hands on one of the bathrooms. This one came from @homedepot. Called the Hampton Bay Regan 3-light, then I added my favorite Edison bulbs for that extra kick! I LOVE the feeling these bulbs give off now, especially with the reflection I now get off the tile!
mirror
Finishing off this space, I was on the hunt for a round mirror and a pretty good size one to fill the space. I ended up purchasing a 37″ round mirror in a Titanium finish.
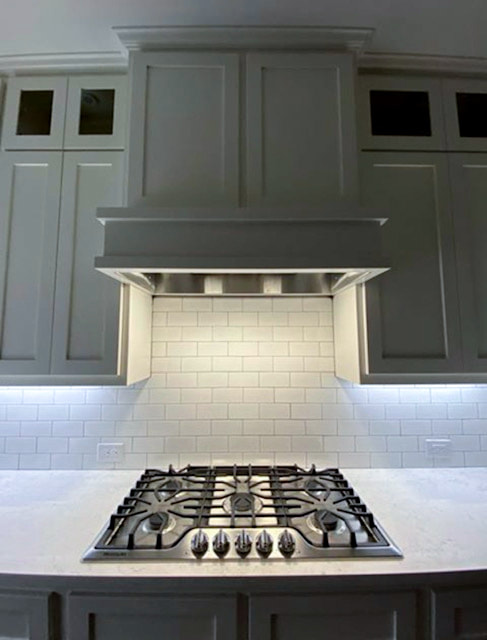
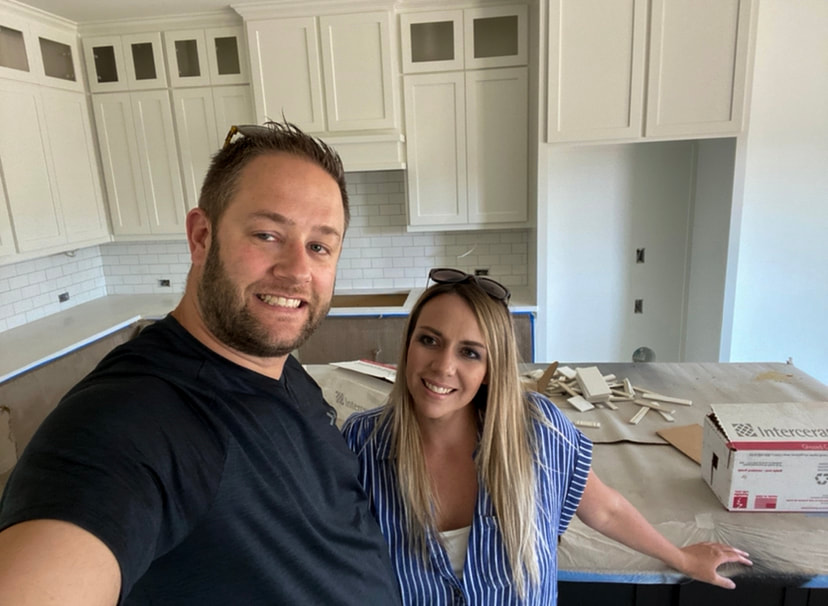
 The one room in which I thought long and hard about… I serious lost sleep over designing this room! Now that we are knee deep into construction, I’m beyond thrilled with all the changes and features we picked out. Above is a picture of our kitchen in progress … The island is BLACK, one of the best decisions EVER!!!
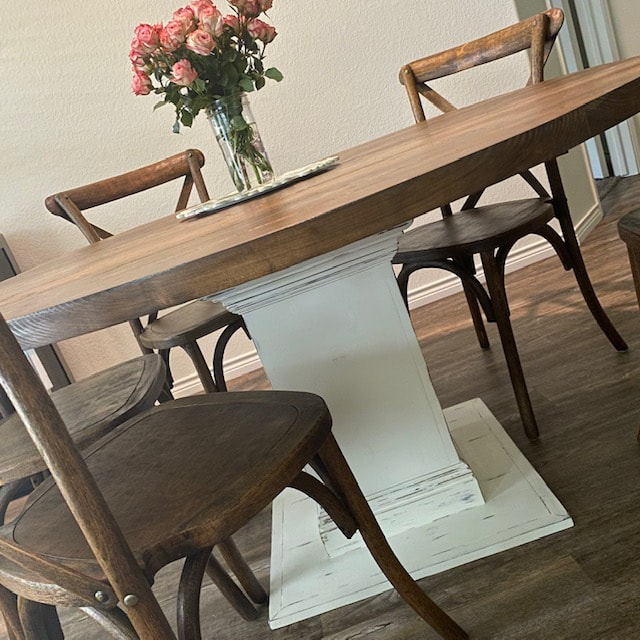
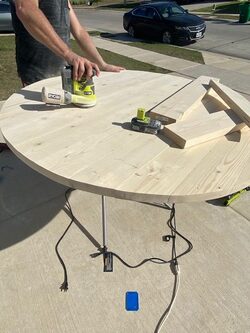
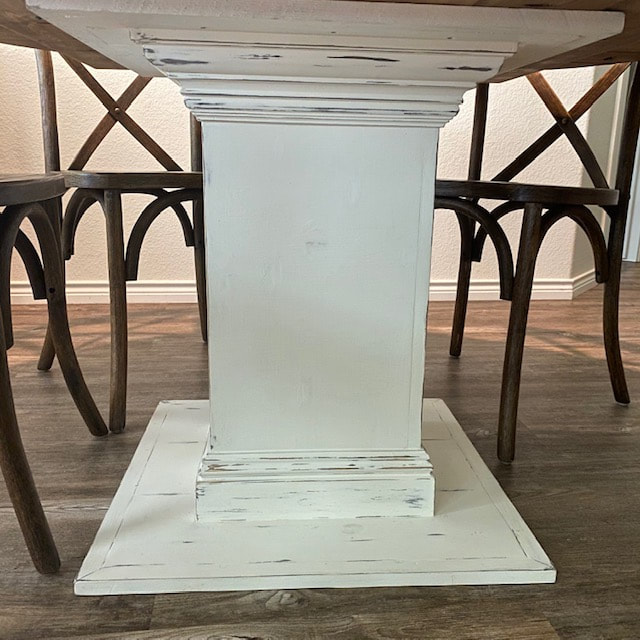
 He's hands down the yin to my yang! Building this house has definitely had it's stressful moments but, with him by my side we can accomplish anything! I really feel like this project deserves a . . . ✨”TA-DA”!!!!✨ I’ve always wanted a round table and our new house has the PERFECT eat-in space for one! The only problem I had was making sure the table was the right size. Meaning, I wanted it only to have 5 chairs. Here is our finished product 🔽🔽🔽🔽
The construction . . .
|