|
How it started ... and where it's GOING!! what's next: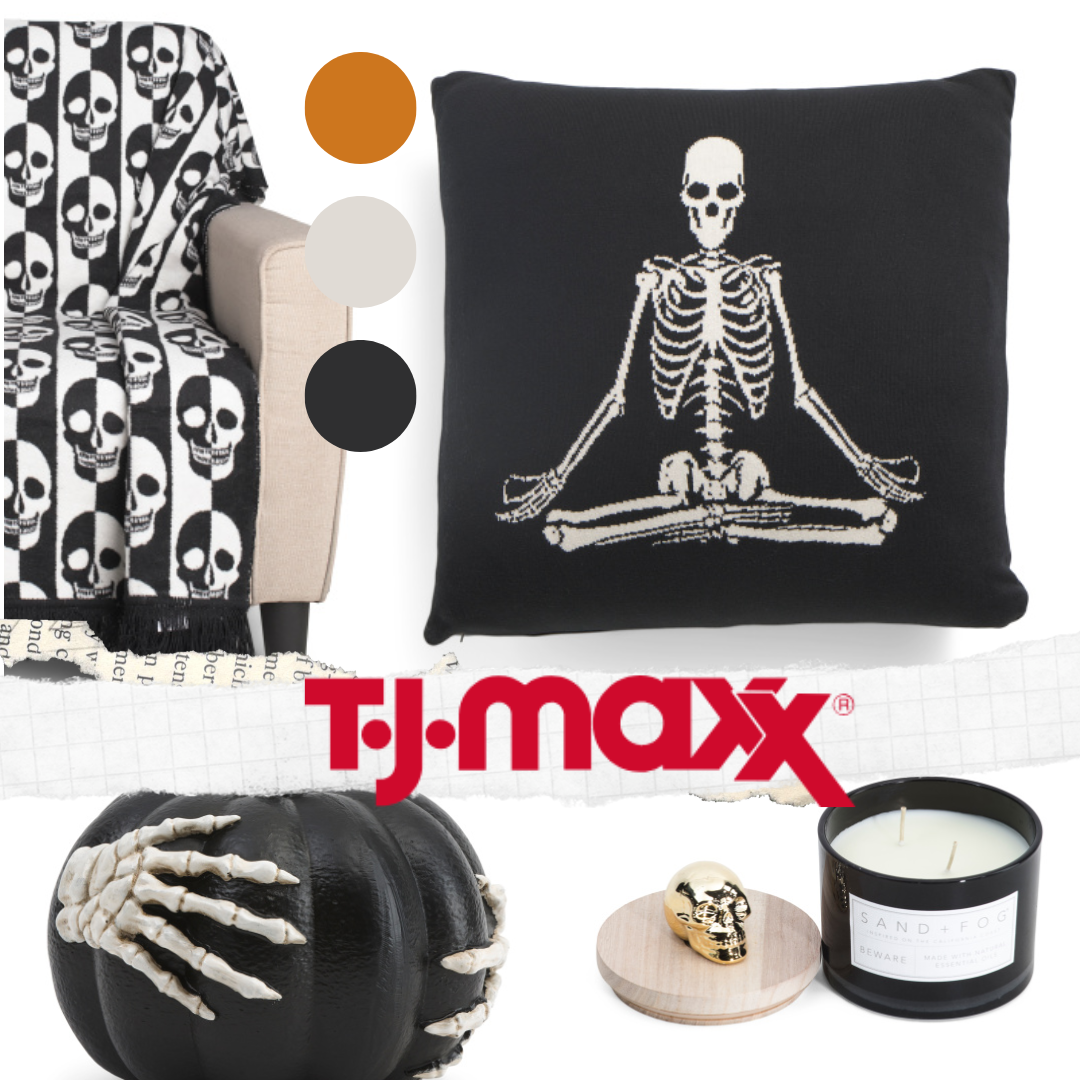
need more skeleton decor?!?
Ummm ... yes please!!
under $20 dollars!!!
Looking for something unique this Halloween season?
Well, look no further ... TjMaxx has some one-of-kind S K E L E T O N finds!!! 
It might show October on the calendar ... but here in Texas it's still in the 90s!!
We are living our early fall swimming season with the new pool where, the water is cooler and the hot tub feels AMAZING!! This weekend the Halloween decorations are going up so skelly took a dip!
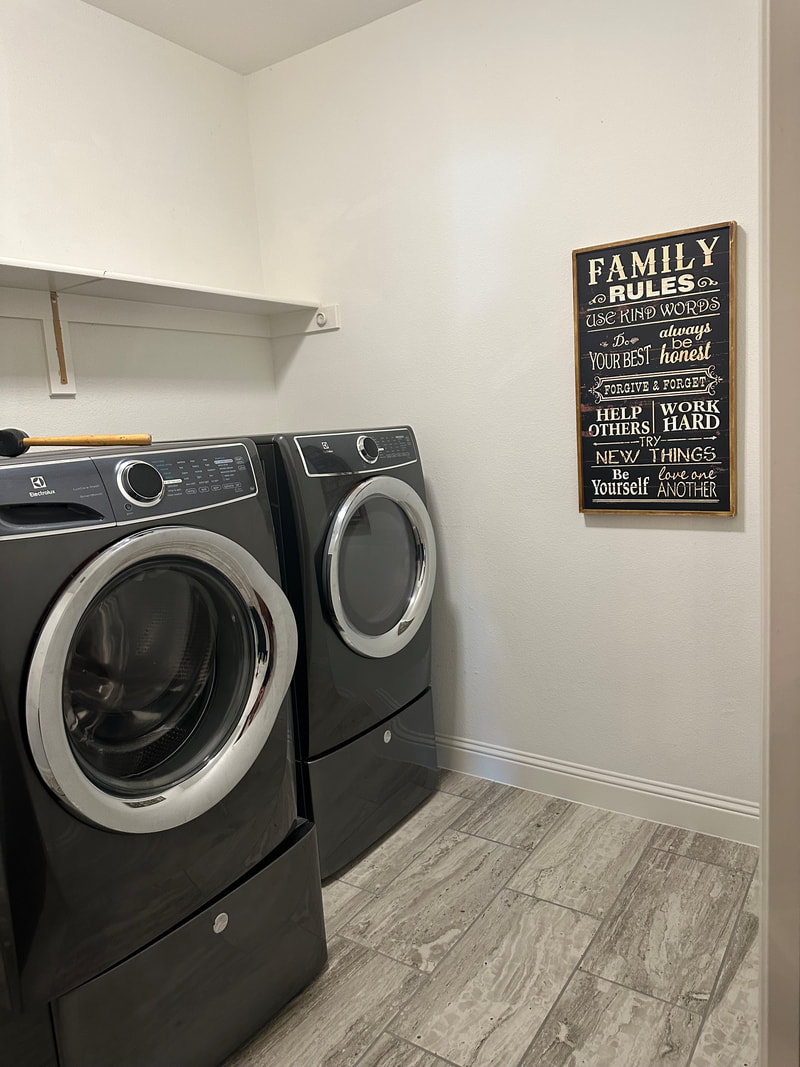
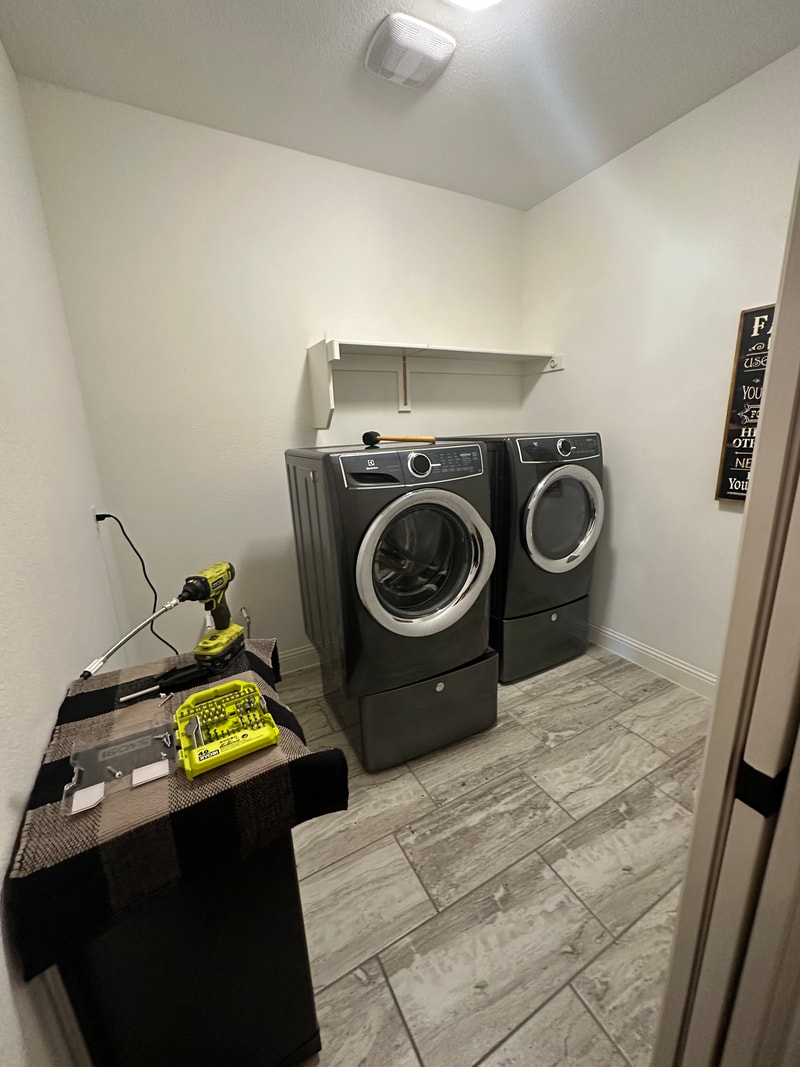
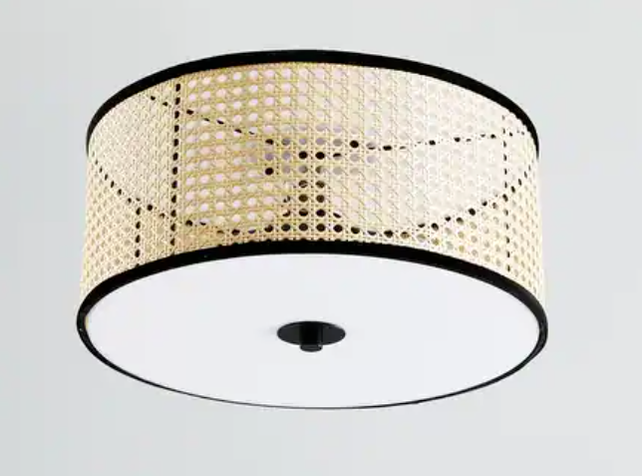
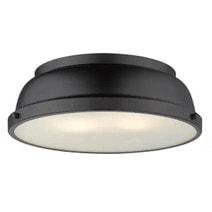
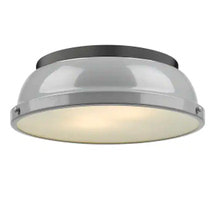
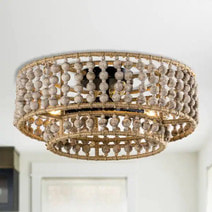
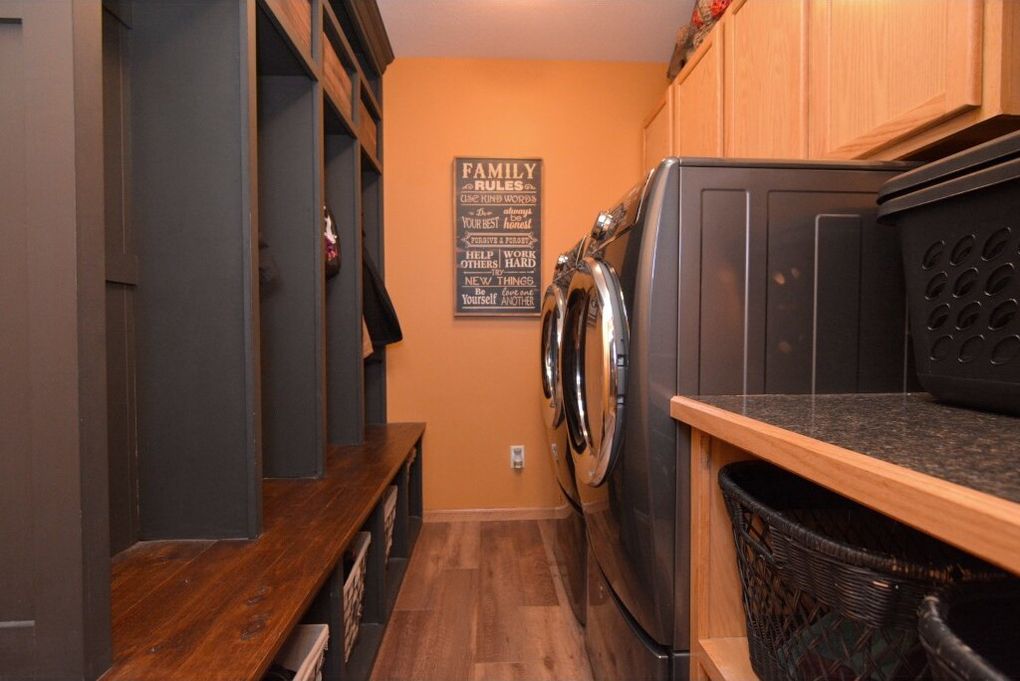
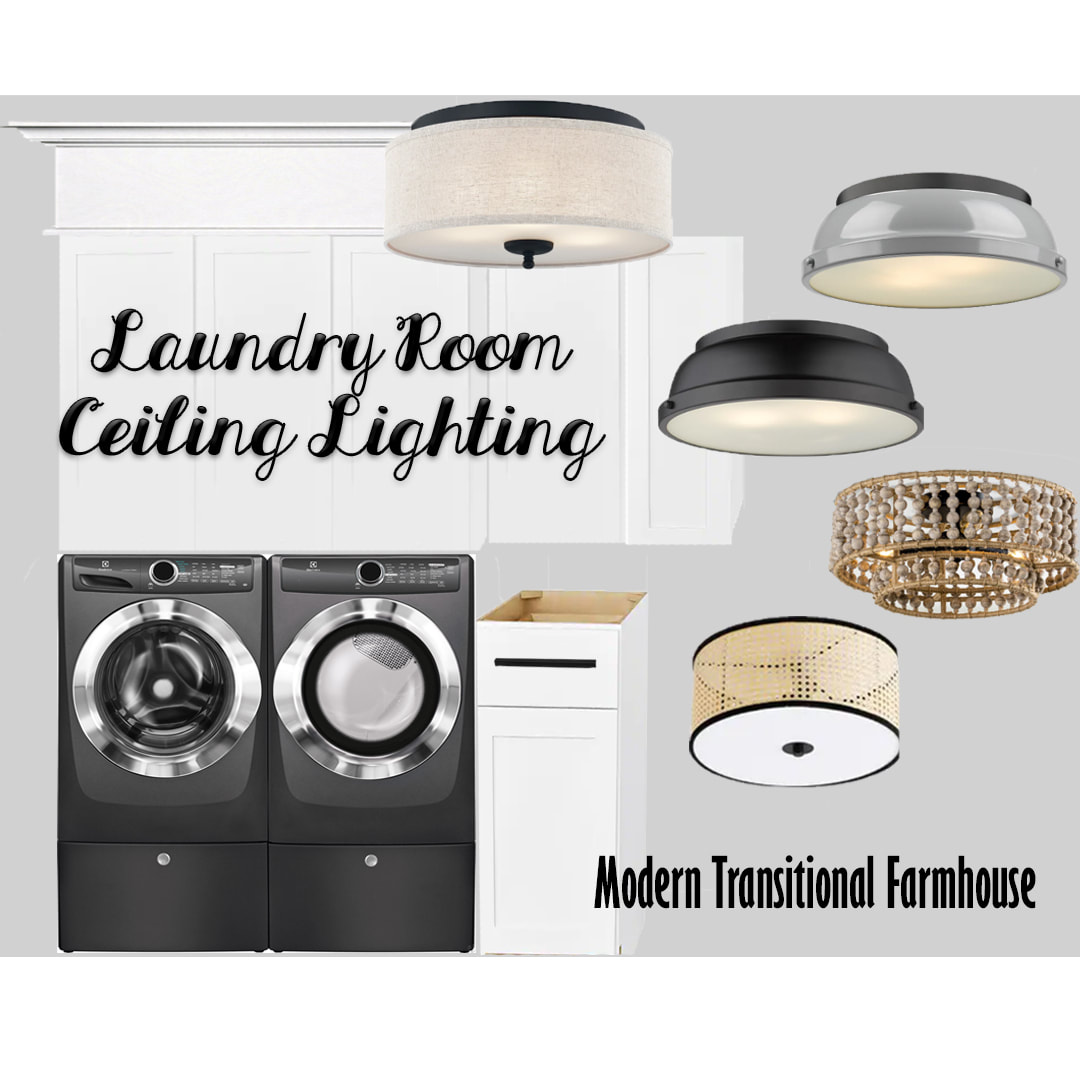 The Laundry Room. This room needs #1 function and #2 style, since construction is already well underway lets now focusing on style. Modern Transitional Farmhouse is the vibe and below I've put together a few options in this style, color, and the perfect size for the room. Adding an element of texture is something all these lights also have. Which one is right for you? You'll have come back to find out which one of these I choose! modern transitional farmhouse
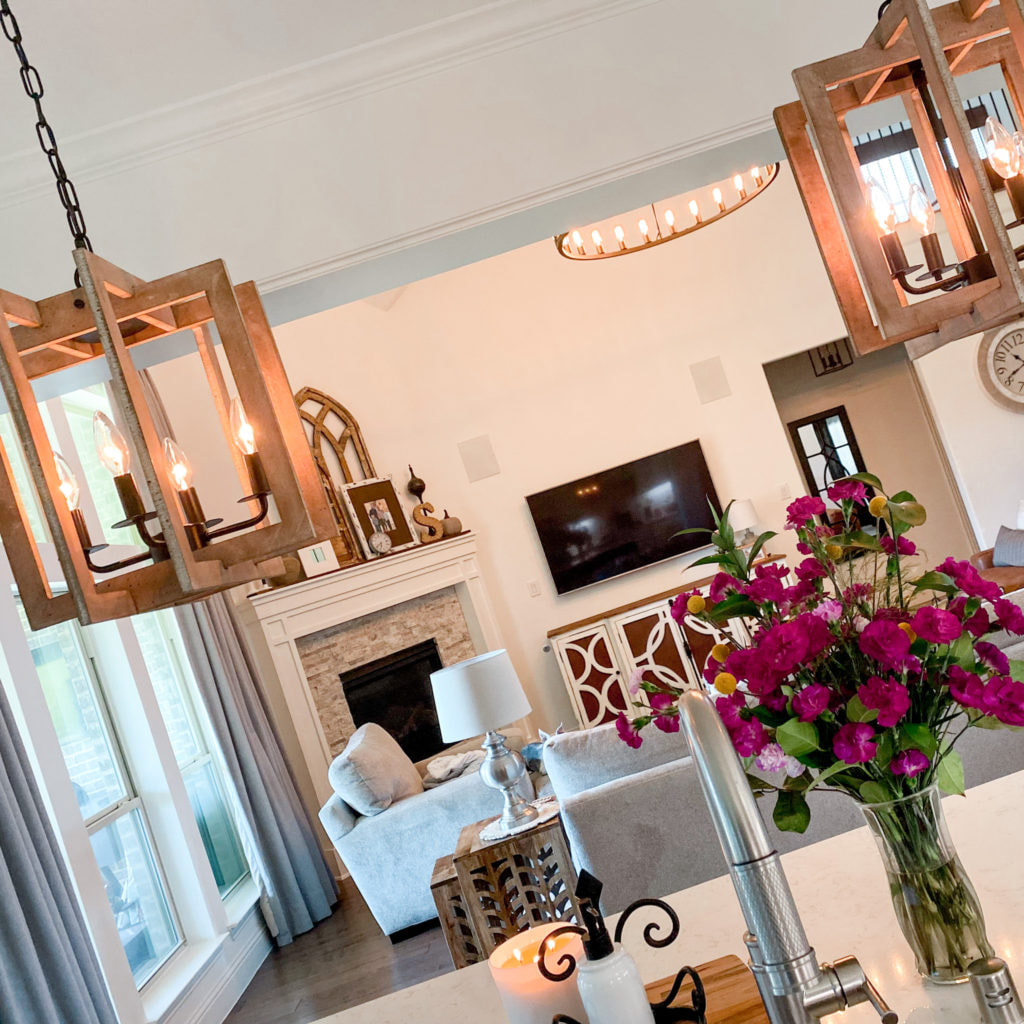
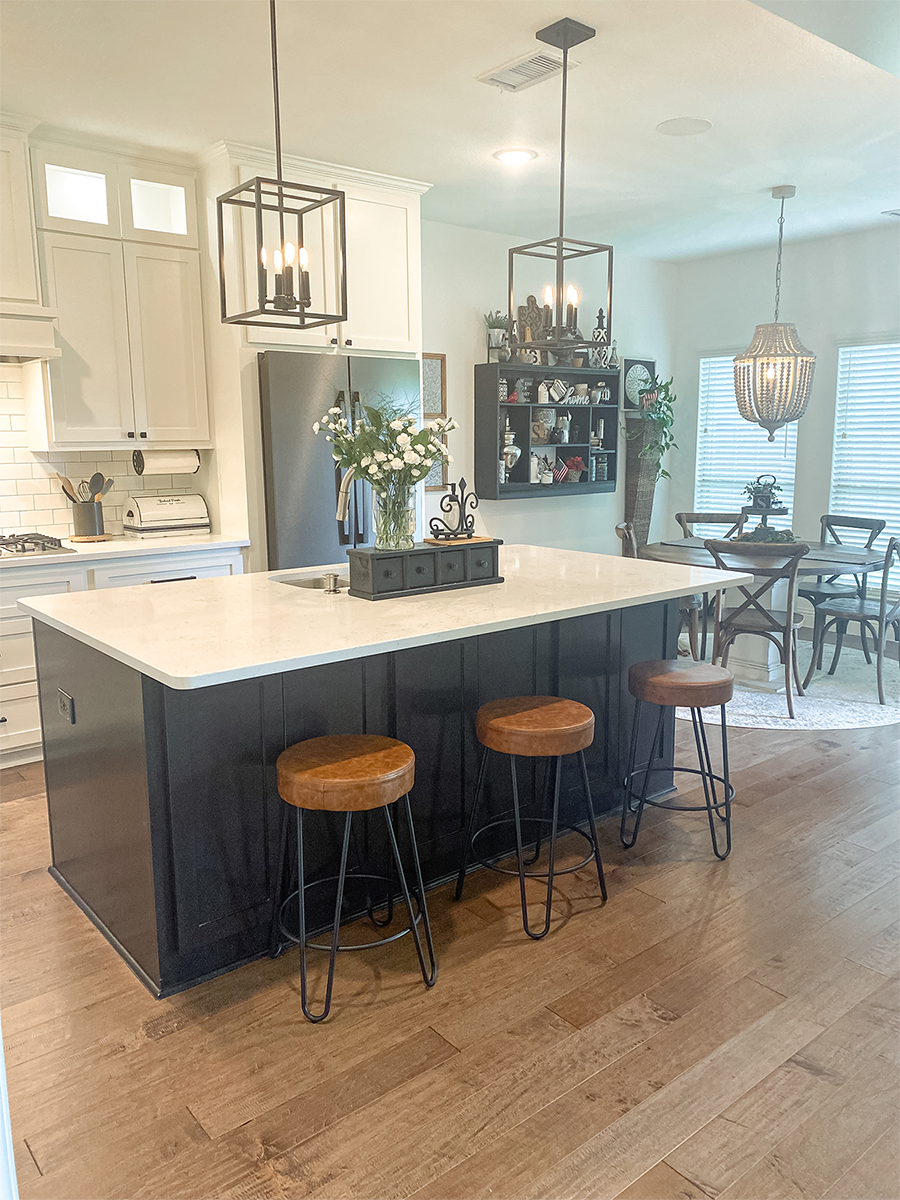
Brighten up your kitchen with these stylish pendant lights! Adding pendant lights over your kitchen island can add both style and function. These wood pendants give a warm/natural touch to any home decor.
This post contains affiliate links. If you use these links to buy something we may earn a commission. Thanks.

More of my Living room home decor:
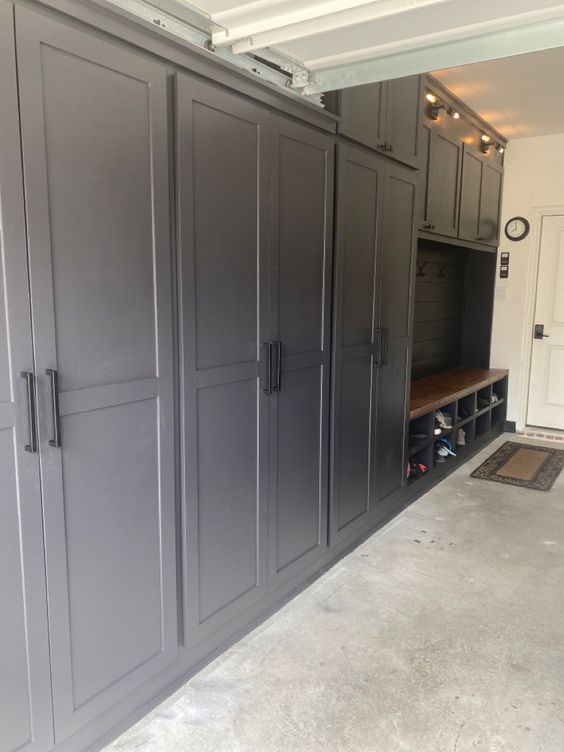
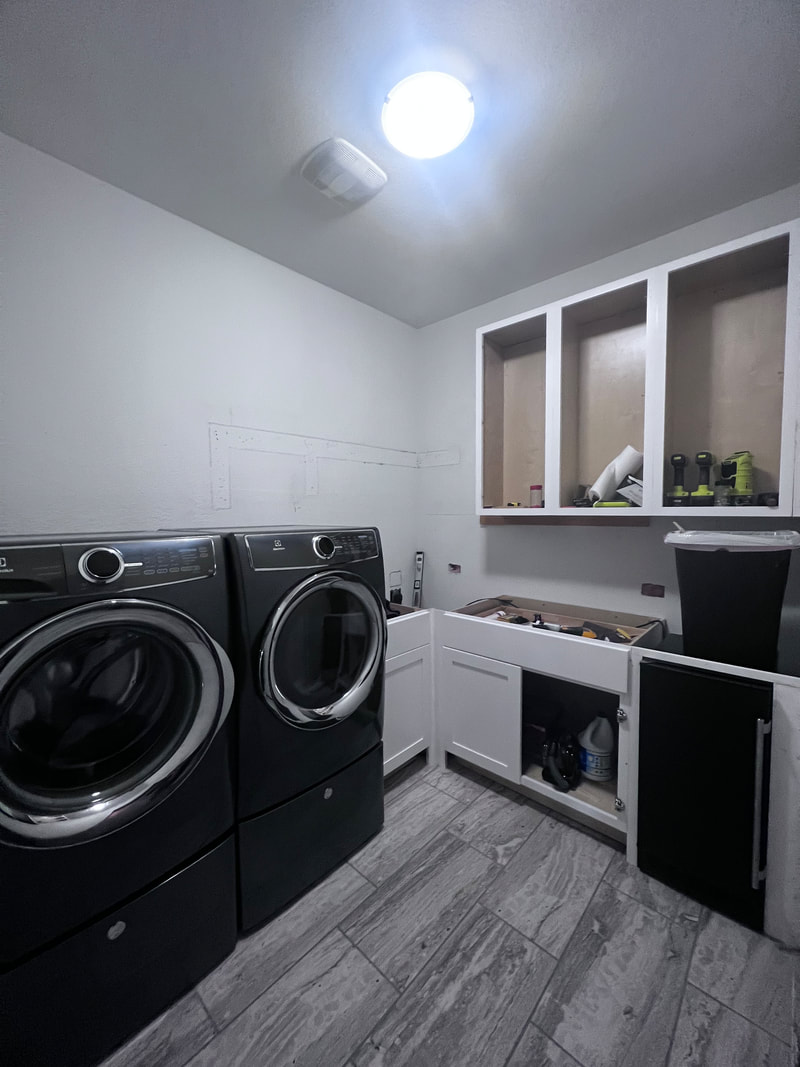
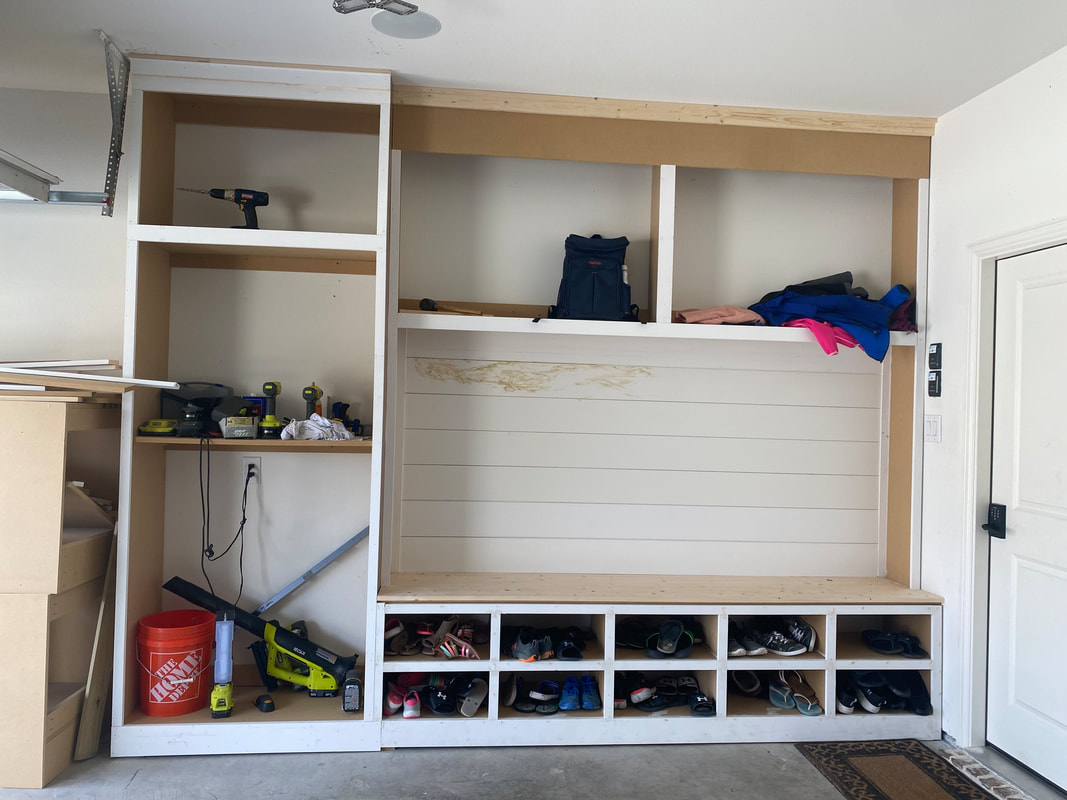
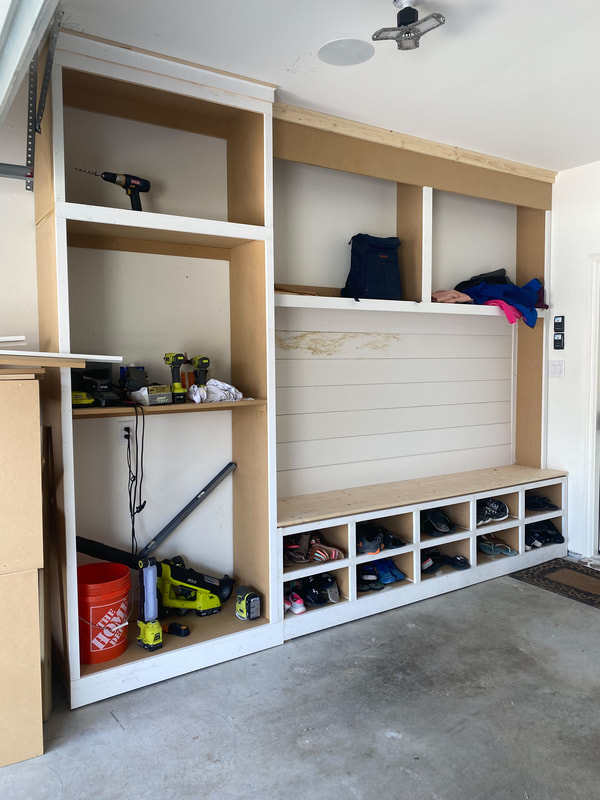
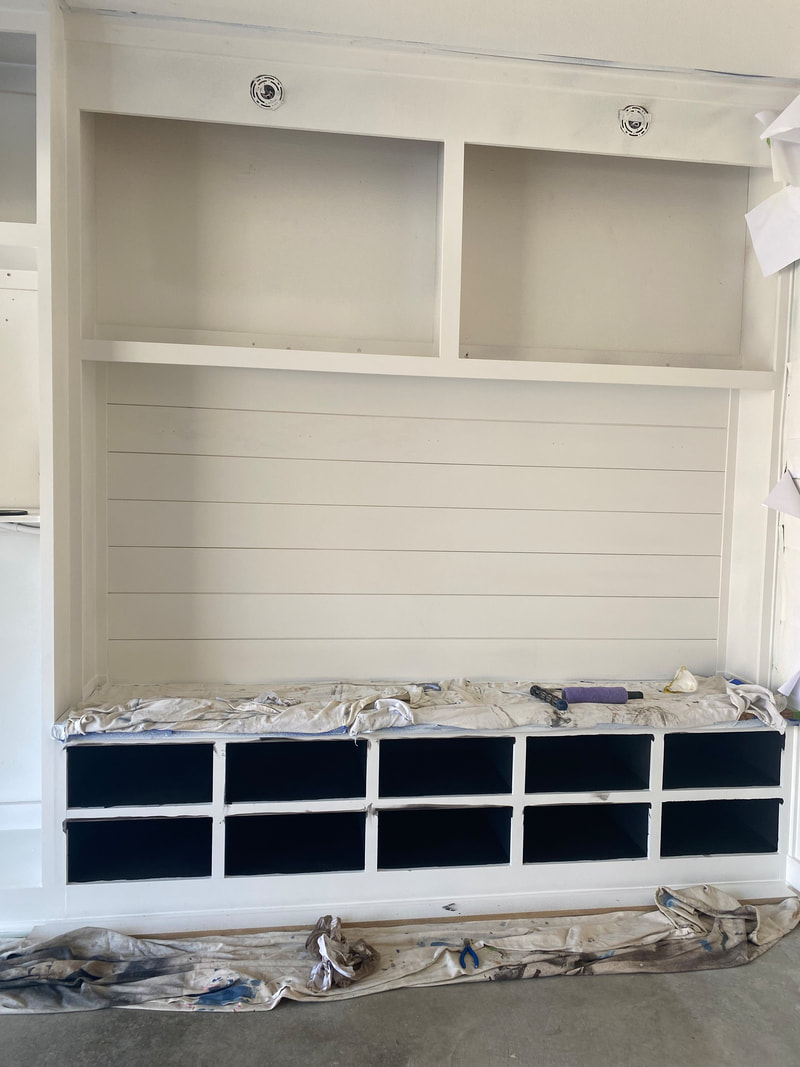
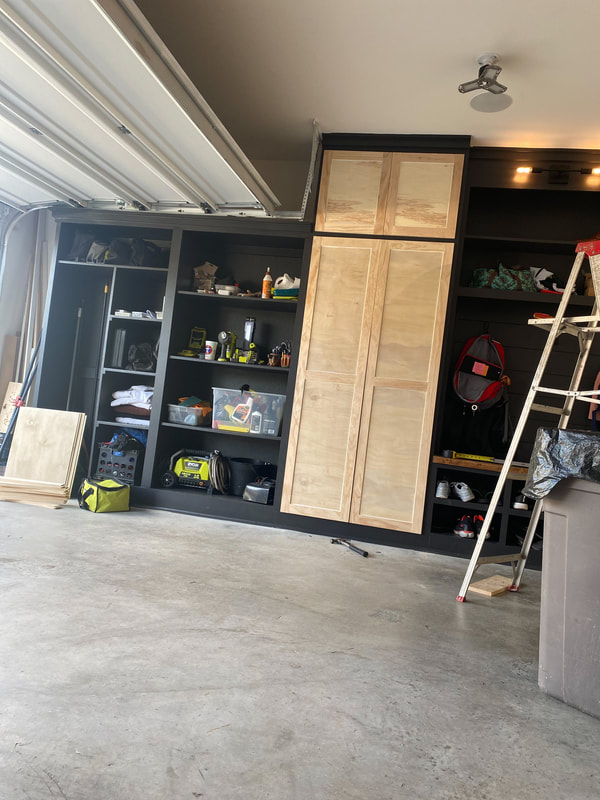
This project has been on our to-do list way BEFORE we even moved into this house. A little back story as to why I knew we needed this locker/storage unit. At our previous home in Wisconsin, we had a mini version of just the lockers (see picture below) it was designed by myself and built by Evan (my husband). It 100% helped with all the storage for the kids however, the downside was the space it was in. Our only option back in WI was the laundry room and we had limited space to work with.

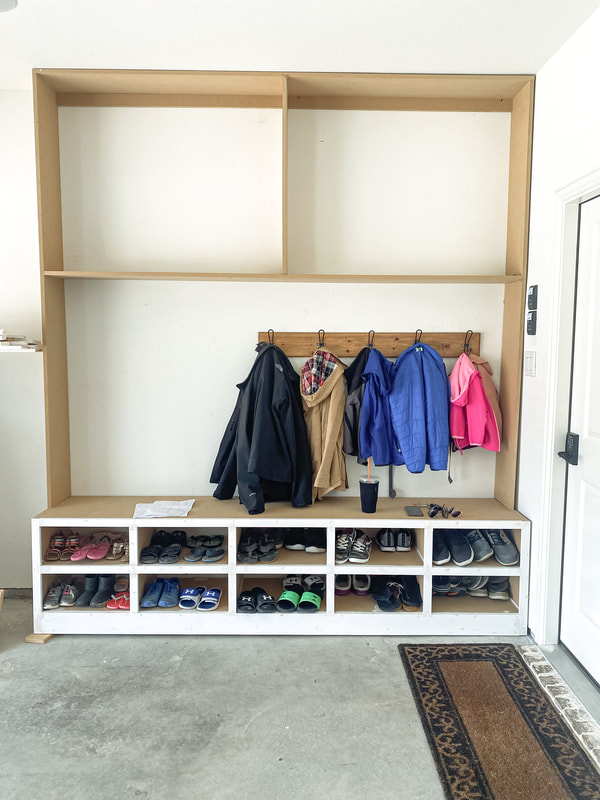
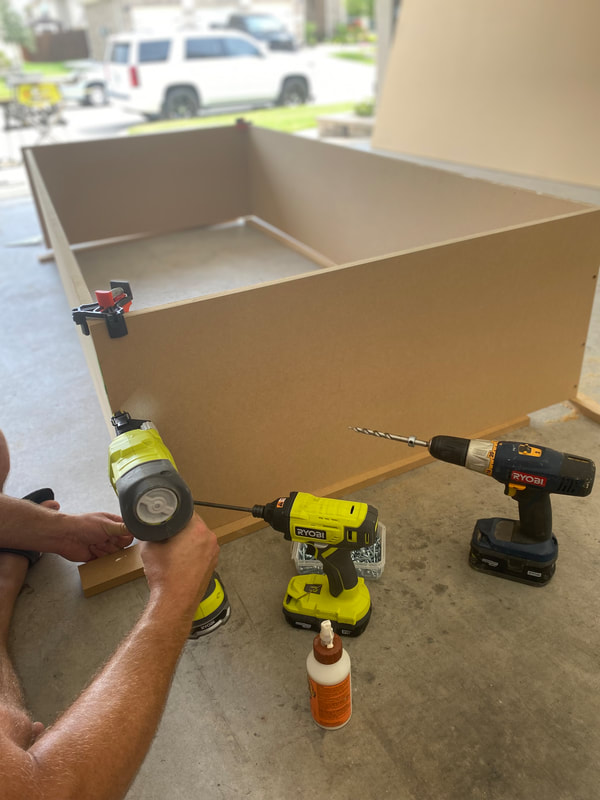
Fast forward to today in our new house. We knew the new updated version would need to be bigger, we needed to add shoe storage, and we had to maximize all the storage in this space that we could! We started with a sketch and literally went to @homedepot! All the pictures you'll see below are the progress photos I took along the way. This whole unit was built piece by piece and customized to the space. Not only function but how it looked was very important to me.
the beginning
Trimming out & shiplap
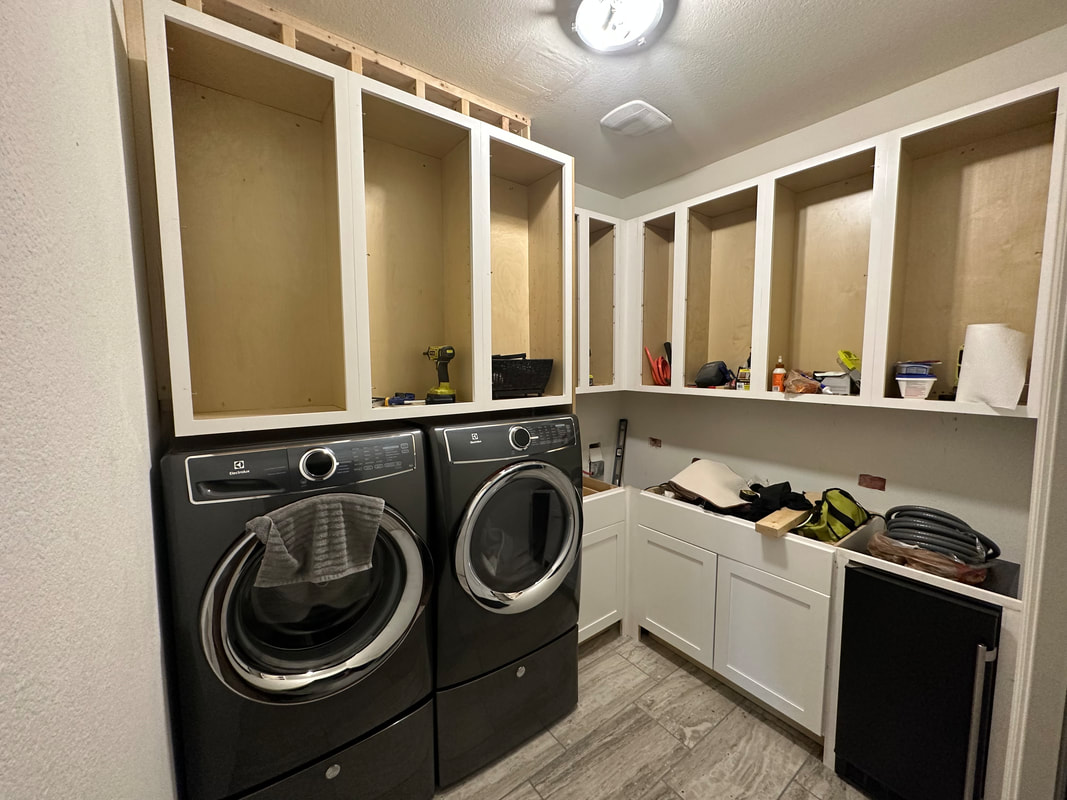
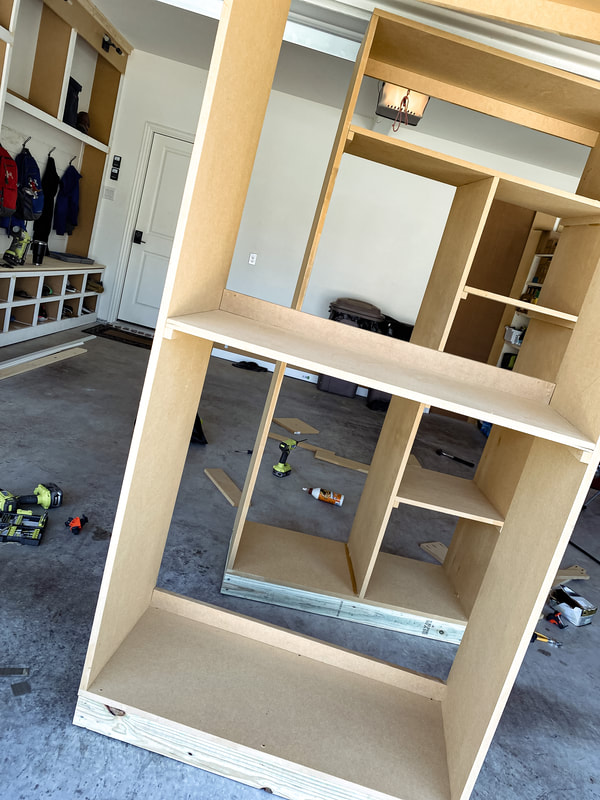
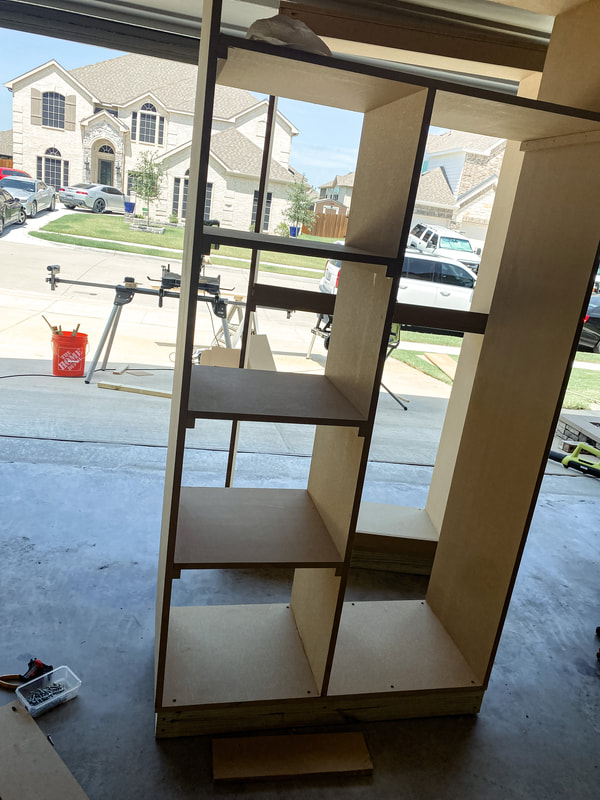
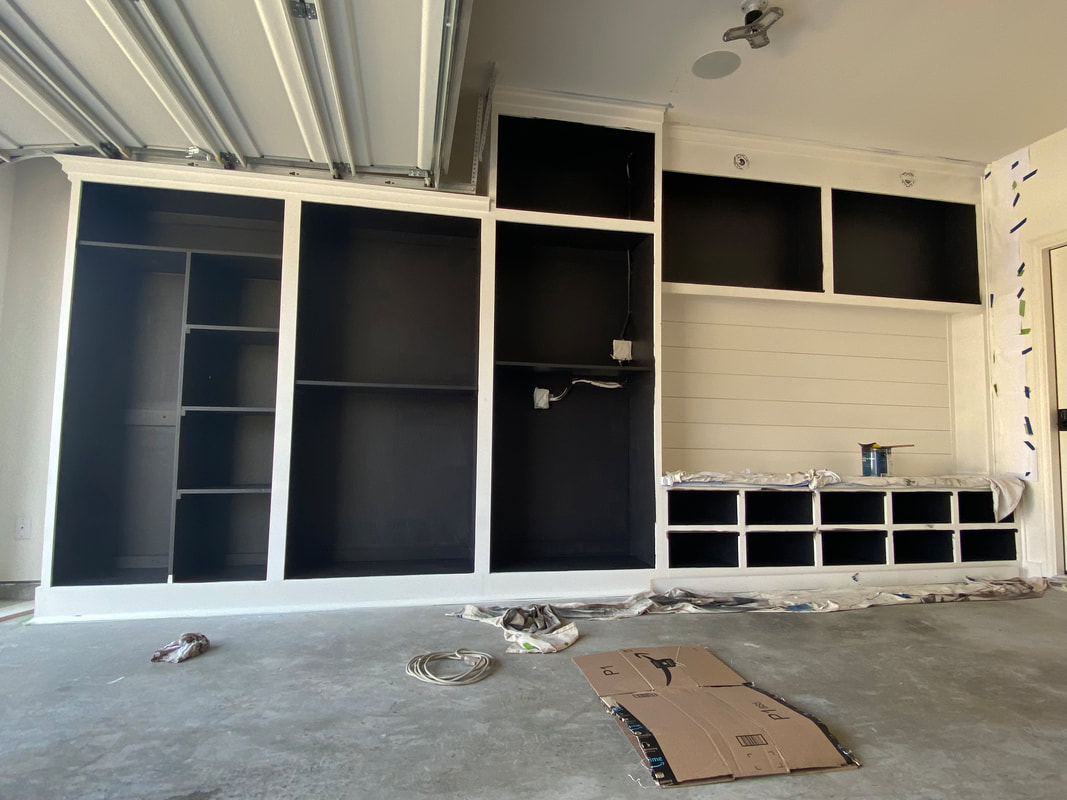
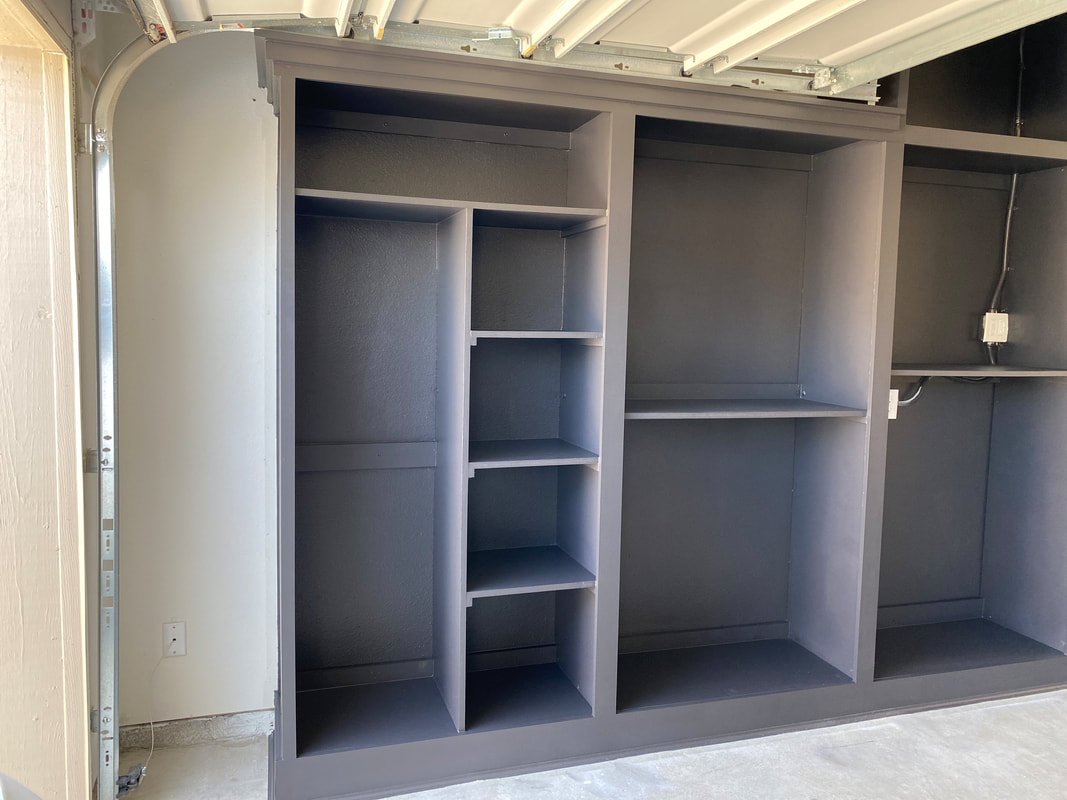
Last two storage cabinets
These are the last two storage cabinets will complete the unit. Additional shelving will be added to the first cabinet once we find out what works best and the last cabinet is perfect. It will he holding lots of Evan's tools to the left and the right - brooms, blower, and long handled supplies.
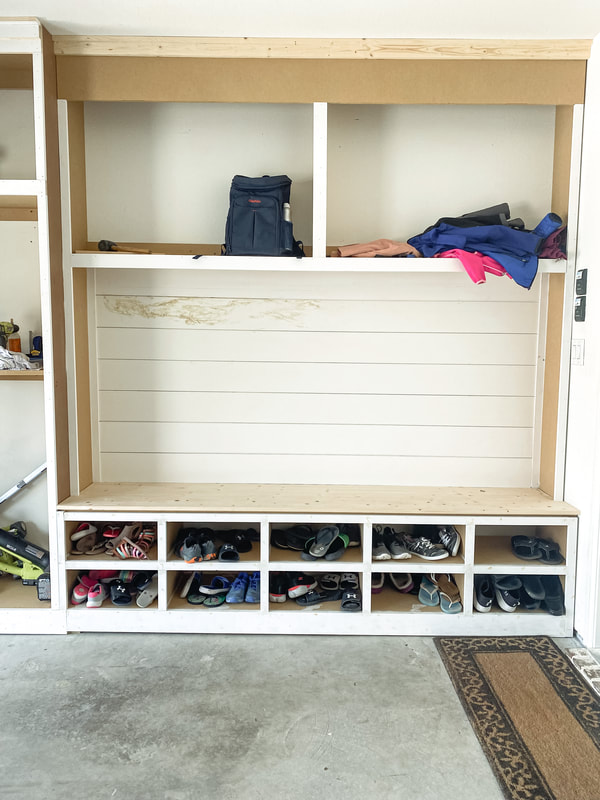
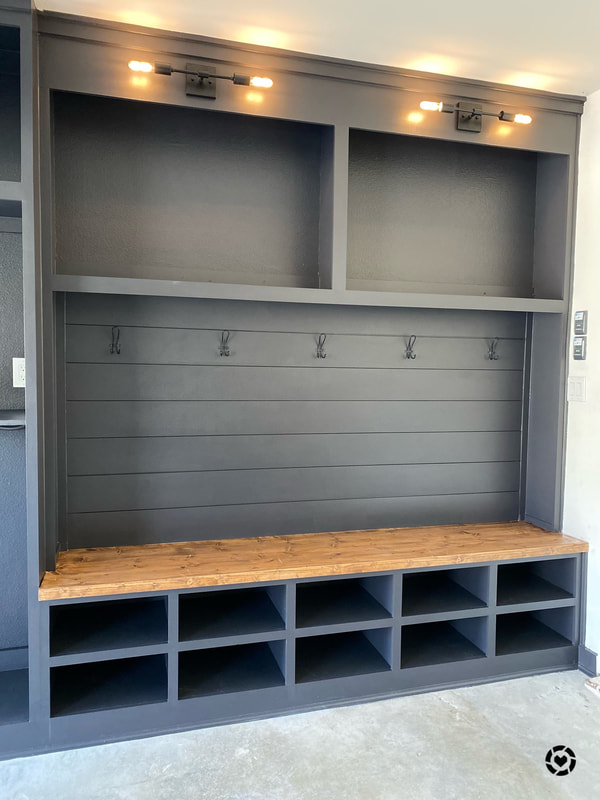
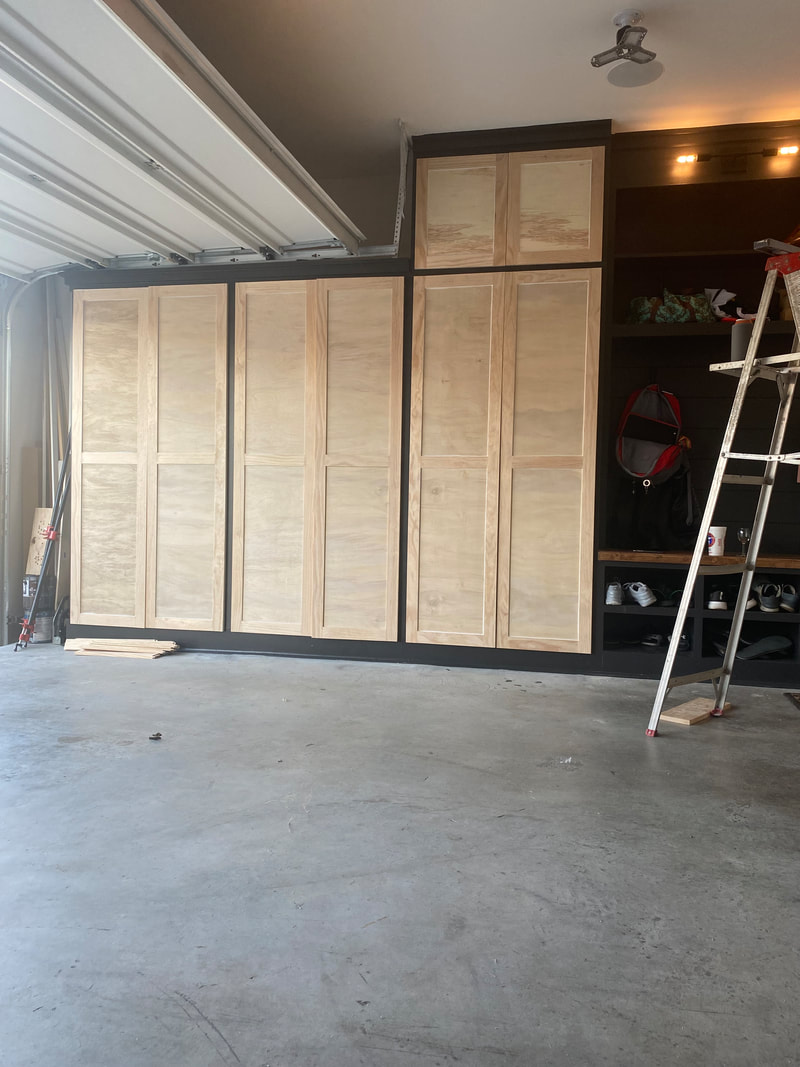
Painting, staining, lighting, & hooks
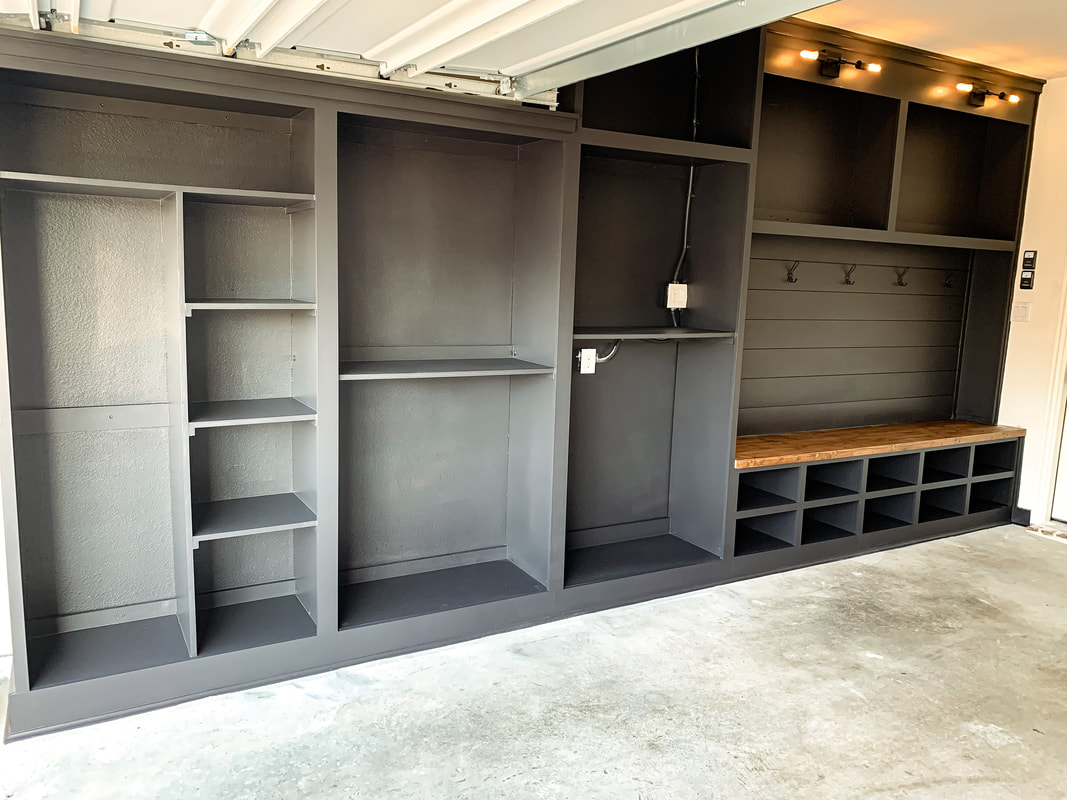
After many coats of paint, staining of the bench seat was completed. I kept the paint and stain consistent with what we have inside our home. Next, was installing our beautiful lights and hooks!
cabinet doors
To finish off this project, the doors were next. Evan has never built anything like this before, so this was really learn as you go for him. The plan was "shaker" style doors, as we have throughout our home. He used a router, router table, and a handy little tool by Kreg called a Concealed Hinge Jig.
done & done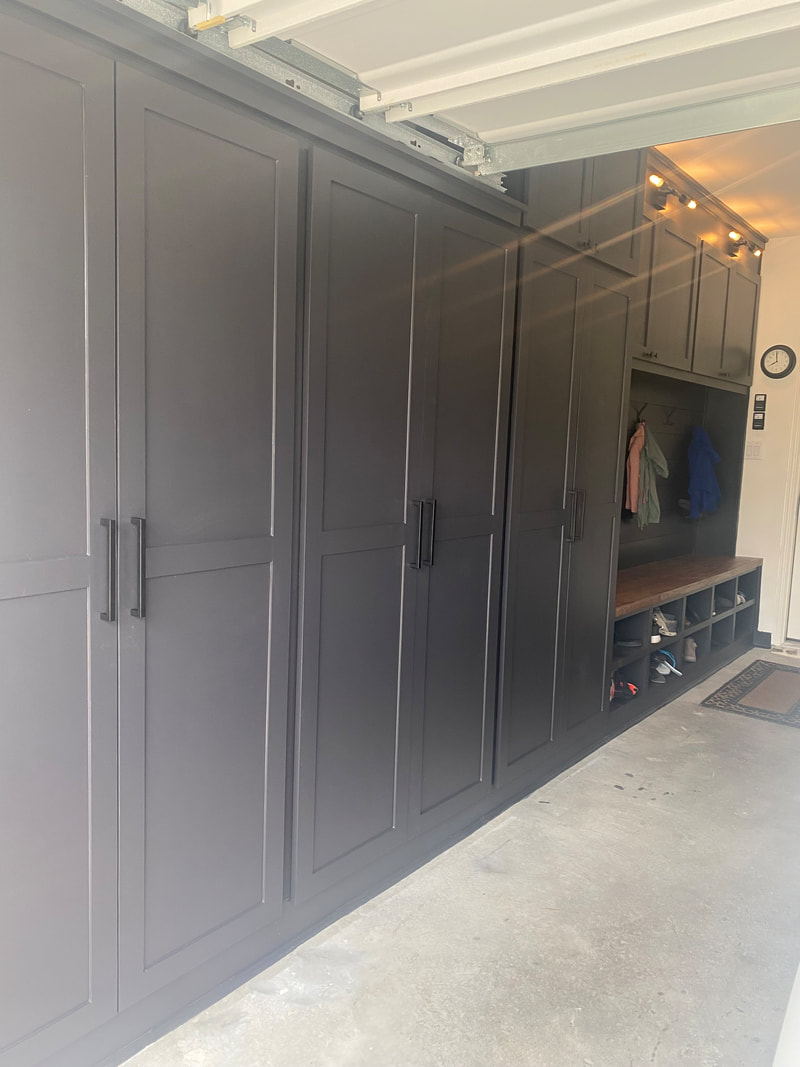
The doors were all painted (three coats to be exact), hinges added, along with knobs/pulls. Theses are the same knobs and pulls inside our home so everything is very consistent throughout. The extra storage these cabinets have are AMAZING, and the fact I can hide everything behind closed doors is PERFECT! The kids are loving having their own hook/shoe storage, and I love that everything has a home :)

The front porch is one of your first impressions of your home. It’s almost like an introduction as to what’s to come inside your home! The first thing I purchased for our new home’s front porch, were some comfortable rocking chairs. The hubby and I love to sit out here and watch the kiddos play. Also, over the summer break I caught more than one child taking a seat here to cool off! I love having this extra space to get out of the sun, relax, have a great conversation, glass of wine, and of course another space to decorate. I love changing up and adding to my front porch with the seasons. The picture above is my “summer” front porch look!
If your in the market for some Wicker Rocking Chairs, here are some great finds to get your started. Rocking chair options:
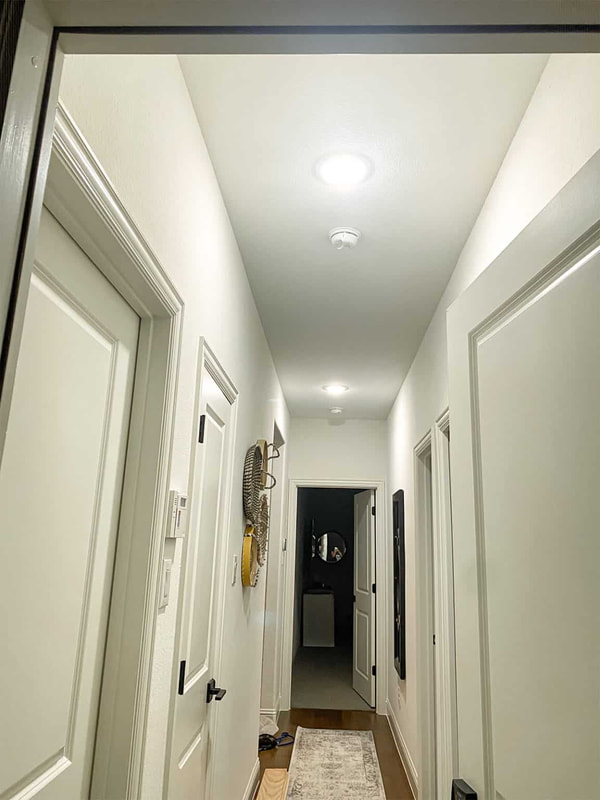
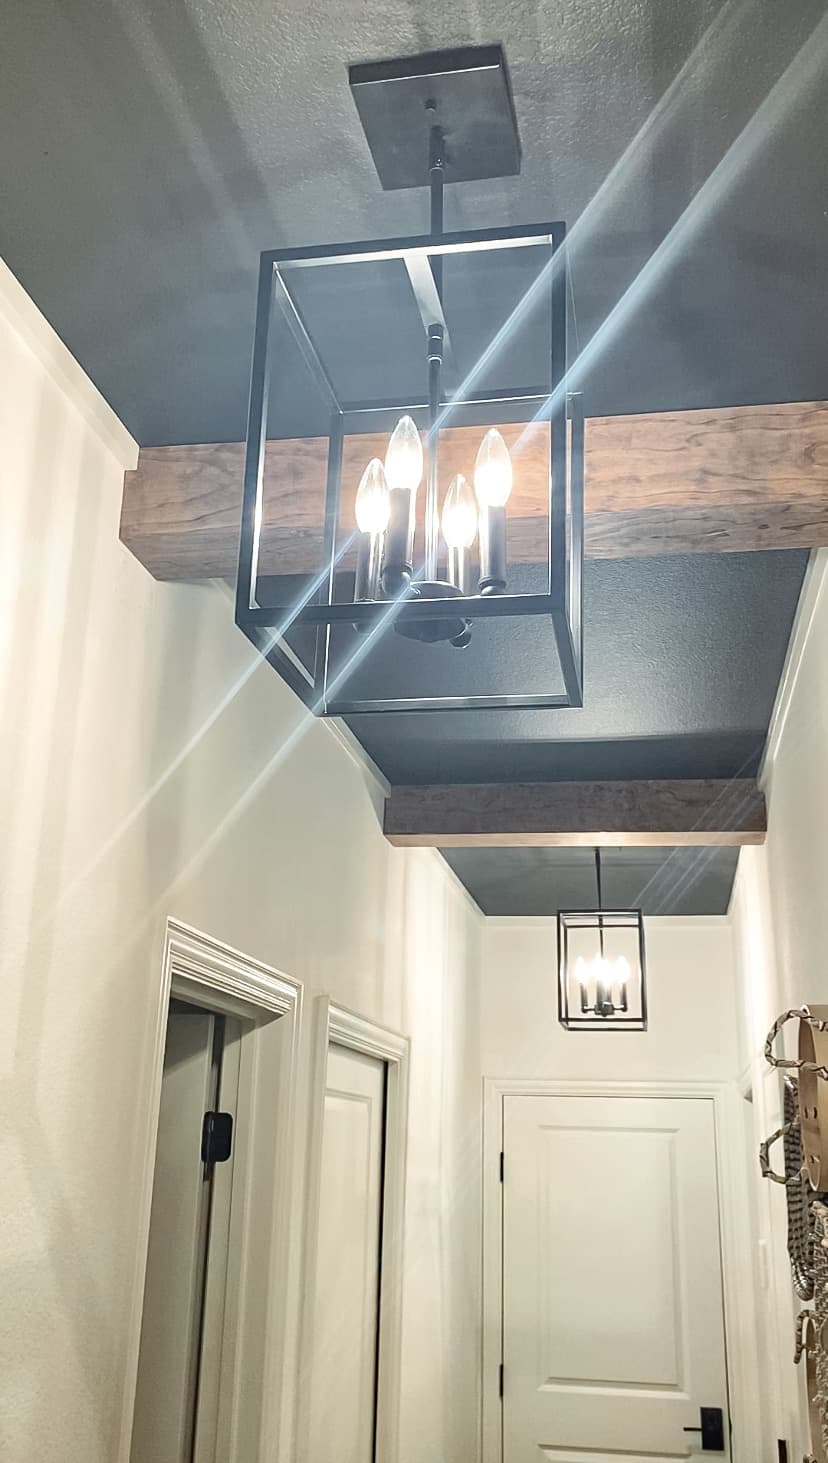
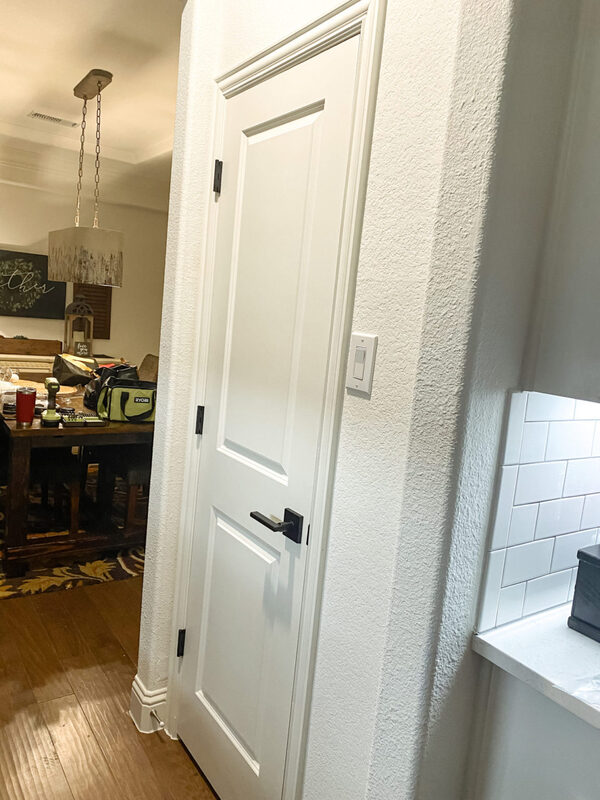
Every time I walked through the backdoor, I knew this hallway was missing something! All I knew is less would be best, but how? If you’ve kept up with my Instagram (if not, follow me here!) you will know my Modern Traditional Farmhouse has white walls with added pops of color (and when I say color, I mean BLACK ) along with lots of millwork!
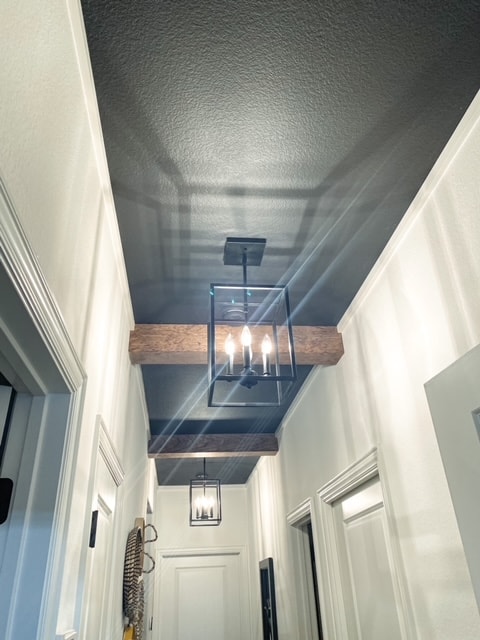
These before/after pictures are AMAZING ... For my Modern Farmhouse Hallway, I started with painting the ceiling black. Black Magic by Sherwin-Williams. I knew in the end trim would be placed around the edges, so this was the easy part. No precise trim-painting skills are needed here. The DIY wood beams were created by my talented husband. He bought the pine boards from @homedepot and constructed these "beams" the night before install, along with sanding and staining. Finally, the lights! These LED ceiling lights are great for being BRIGHT .. however, I was creating a "mood" and these needed to-go. I ended up re-using my old kitchen pendant lights (see picture of them in my kitchen). These square, black, wrought-iron looking pendants were prefect for my hallway. We ended up replacing the down rod to a smaller one and bam, they had a new home!
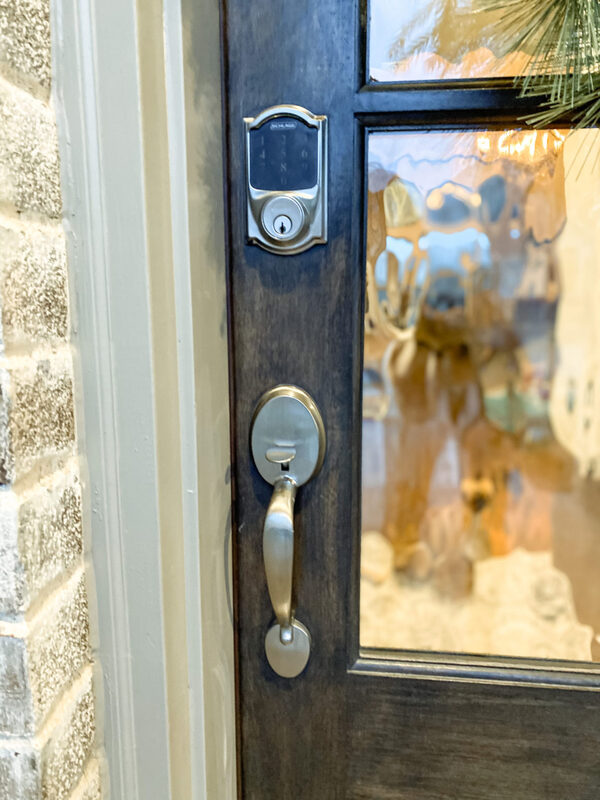
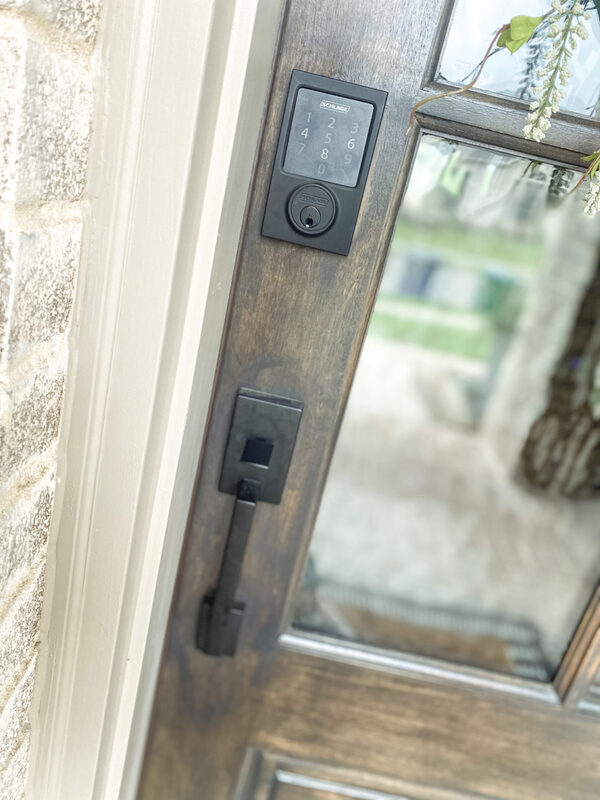
front door before/after ...

|